

My Two Favorite Hacks for Saving Time in the Kitchen - LFN#032
+ All about How to Bring Butter and Eggs to Room Temperature, and a new website feature just for subscribers B4 we go... (Right here, keep scrolling 👇)

Welcome to this week’s installment of Living Fully Nourished, where we’re getting into saving time in the kitchen. You’ll discover why the temperature of butter and eggs is essential in recipes and my two favorite kitchen hacks for warming them. Let’s get started!
Precision in Baking is Key - Or, How to Bring Butter and Eggs to Room Temperature
Perhaps you’re familiar with the age-old saying: “Precision is key when it comes to baking.”
I’ve heard the same sentiment regarding gluten-free cooking and baking. However, I never quite understood the comparison until recently when I received an email from a subscriber newly diagnosed with celiac disease who was so intimidated and frustrated by going gluten-free that it nearly debilitated her cooking and baking abilities.
After several email exchanges about her triumphs and trials in gluten-free cooking and baking, I uncovered that her fear extended far beyond correctly measuring flour, xanthan gum, and liquids. During our conversation, she somewhat hesitantly admitted that cooking and baking troubles weren’t a new problem for her. Even before her diagnosis, recipe flops were the norm for her. After looking much closer at this, we connected the dots, discovering that paying attention to handling and preparing your ingredients is equally important.
I get it. Life is busy, and who doesn’t want to save time in the kitchen?
Fortunately, most recipes (others and mine) include preparation tips, such as the recommendation to use “room-temperature eggs” or “softened butter.”
I typically always emphasize that you control your kitchen and don’t need to follow anyone else’s advice 100%. However, and most importantly, when it comes to baking and executing recipes, it is essential to follow the methods set in the recipe.
The Art of Mixing Liquids and Solids
Mixing liquids and solids (especially in baking) might be compared to creatively balancing blocks in the game Jenga®. It’s the perfect combination of skill and science, and some might include luck, whereas if “the blocks” (in this case, these ingredient elements that make up the recipe) are placed (combined) in a fashion where they don’t tip (and instead cream) – it’s brilliantly simple.
Lose it; the interaction between the equal and opposite forces will likely make things tumble.
Epic - “How to Hack Jenga Using Science” by Rhett Allain - Popular Mechanics
Newton’s law and luck aside, creating a perfect cake or a delicious batch of cookies involves trapping air to transform a balance of various ingredients. Every element must harmonize seamlessly for the best outcome.
The temperature of ingredients plays a critical role in achieving the desired texture in various baked goods. Using room-temperature eggs, fat, and liquid is essential for creating a smooth batter. Temperature is especially crucial for butter, as it aids in developing a velvety consistency.
How to Quickly Bring Butter to Room Temperature
Smooth, room-temperature butter has a luxurious creaminess that is perfect for blending with sugar to create a light and airy texture in batters and doughs that require the creaming technique in baking.
This airflow helps cookies maintain their desired thickness, preventing them from over-flattening. Additionally, it assists cakes in rising correctly to achieve a fluffy and light texture.
What is the importance of using softened butter?
Using cold butter straight from the fridge can create difficulties when mixing, resulting in uneven dough textures. Although some recipes call for cold butter, like in pie crusts, it’s essential to make sure the butter isn’t too cold. If the butter is overly chilled, it can make the pie dough dry and delicate, leading to the need for extra water. Overly chilled butter can cause problems such as shrinking and toughness in the pie crust after baking.
On the flip side, if the butter is too soft, it may not be able to appropriately incorporate air, causing cakes and cookies to turn out flat. Using melted or warm butter instead of room temperature interferes with the aeration process, resulting in a heavier, greasier batter. Melted butter creates unstable air bubbles that collapse, making cookies spread too much and cakes become overly dense and sticky.
What exactly is softened butter, and how should it feel?
To determine the ideal temperature of your butter, look for a smooth matte appearance rather than a shiny gloss. If the butter seems too glossy, it may have melted too much. A quick way to test its readiness is to lightly press a finger into the butter; if it leaves a slight indentation, it is ready to use.
The Optimal Method for Softening Butter
Most bakers agree that the most effective way to soften butter is to leave it at room temperature before baking. However, this approach does necessitate some pre-planning. If you have the time, the best way to soften it is to let it sit at room temperature for 30 minutes up to an hour, considering its initial temperature and the room’s warmth. The butter should be pliable when gently pressed but not melted.
If the butter gets too soft, place it in the refrigerator for a few minutes to firm it back up before using. This approach is preferred for its consistency. However, other methods will also work if you’re pressed for time and suddenly feel like baking.
Kitchen Hack #1 - The Best Way to Quickly Soften Butter
Let’s be honest: if you’re like me, you’ve tried nuking a solid stick of butter to end up with a buttery, melty mess of liquid butter to clean up. So, if you’re tired of the microwave’s hit-or-miss results, which can either melt the outside or leave the inside rock solid, you’ll be happy to know there are a few better tips I’ve discovered over the years for softening butter when you’re in a hurry.
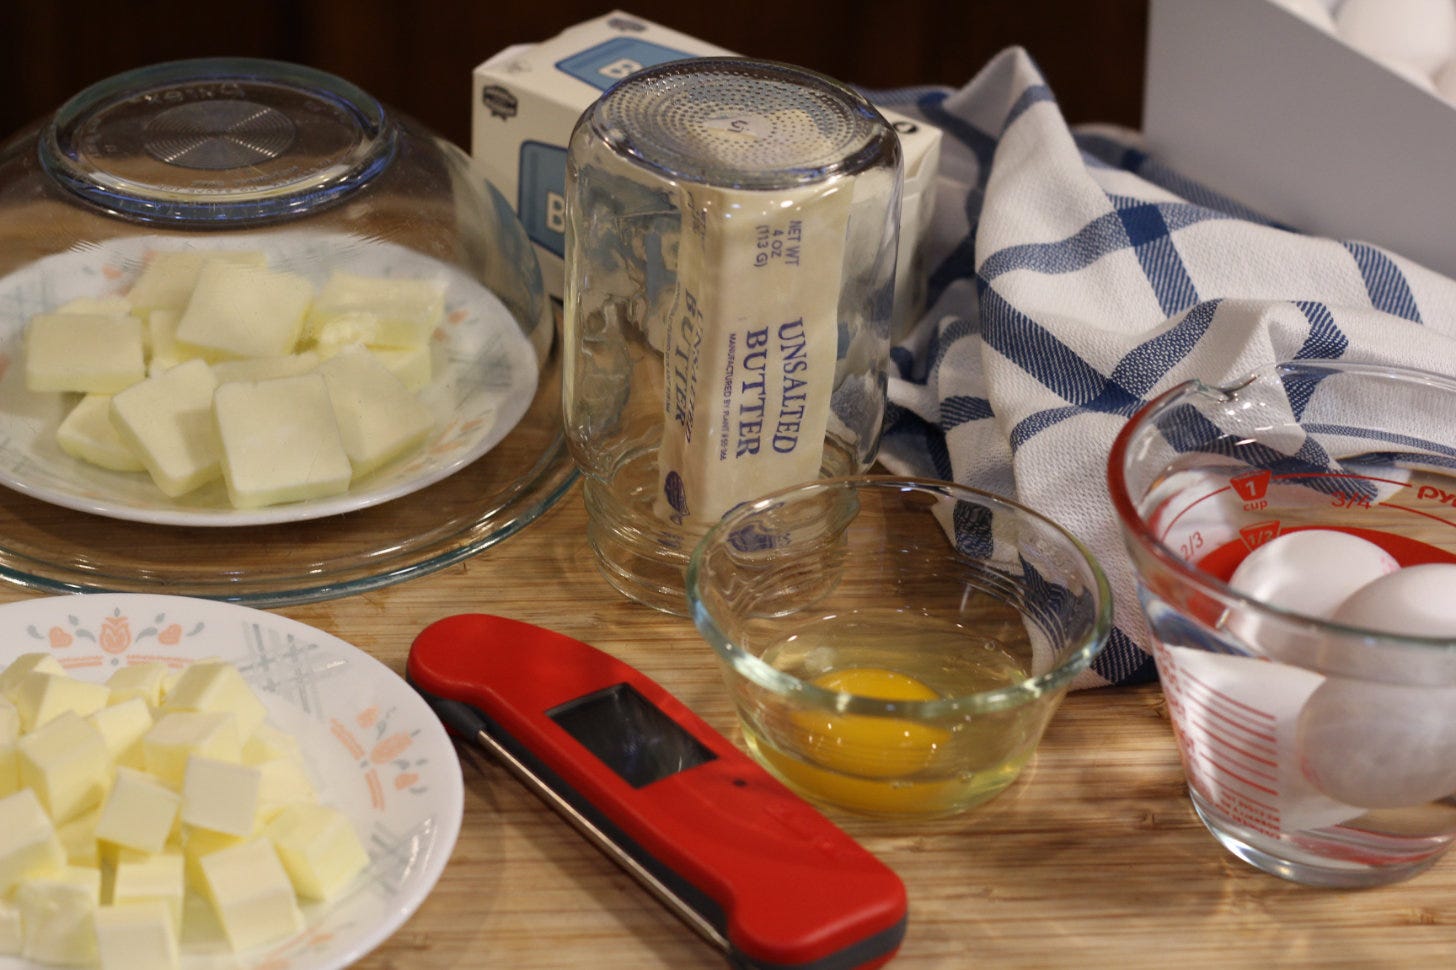
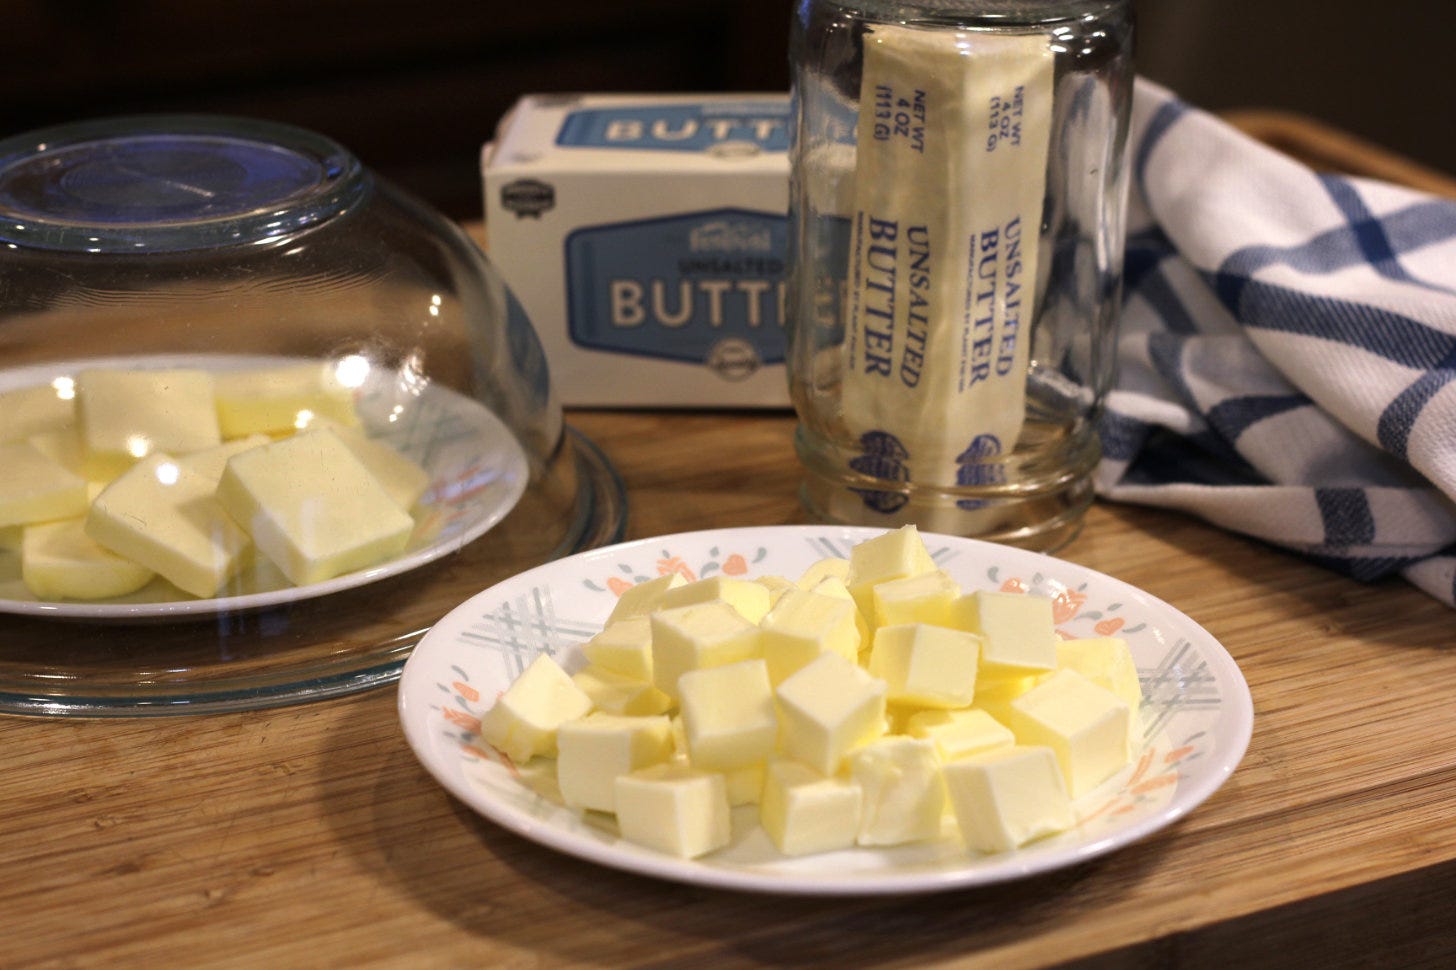
Cut it into cubes:
If you don’t have 30+ minutes to wait, consider cutting a stick of butter into cubes. This quick method only requires about 10 minutes. The smaller pieces allow for faster softening compared to a whole stick. Depending on your time, leave the cubes out at room temperature or position them close to a warm stove for quicker results. As a side note, you’ll want to closely watch the cubes placed near heat to prevent them from melting too much.
Pound it flat:
Giving the butter a good pounding can also be a quick and effective way to soften it while venting any frustration 😉. Place the stick of butter in a plastic bag or between two sheets of plastic wrap and use a rolling pin or the flat side of a meat pounder to flatten it out. The pressure and motion will help warm the butter and increase its surface area for quicker softening.
Grate it:
Grating butter can be a lifesaver when you need to soften it for baking. Use the large holes on a box grater to create fluffy, shredded butter that will instantly soften. This method lets you have softened butter ready for use in no time, perfect for when your cookies can’t wait!
Warm it under glass:
My favorite way to quickly soften butter without nuking it in the microwave is to warm it under glass. This method is excellent for softening butter in under 10 minutes—and there are only three steps to do it!
1. Heat water in a jar or bowl.
2. Pour the water out, and turn the vessel upside down over the top to cover the butter.
3. Let it sit for 10 minutes. Voila! Softened butter! (wink)😉
You have two choices when using the glass warming method.
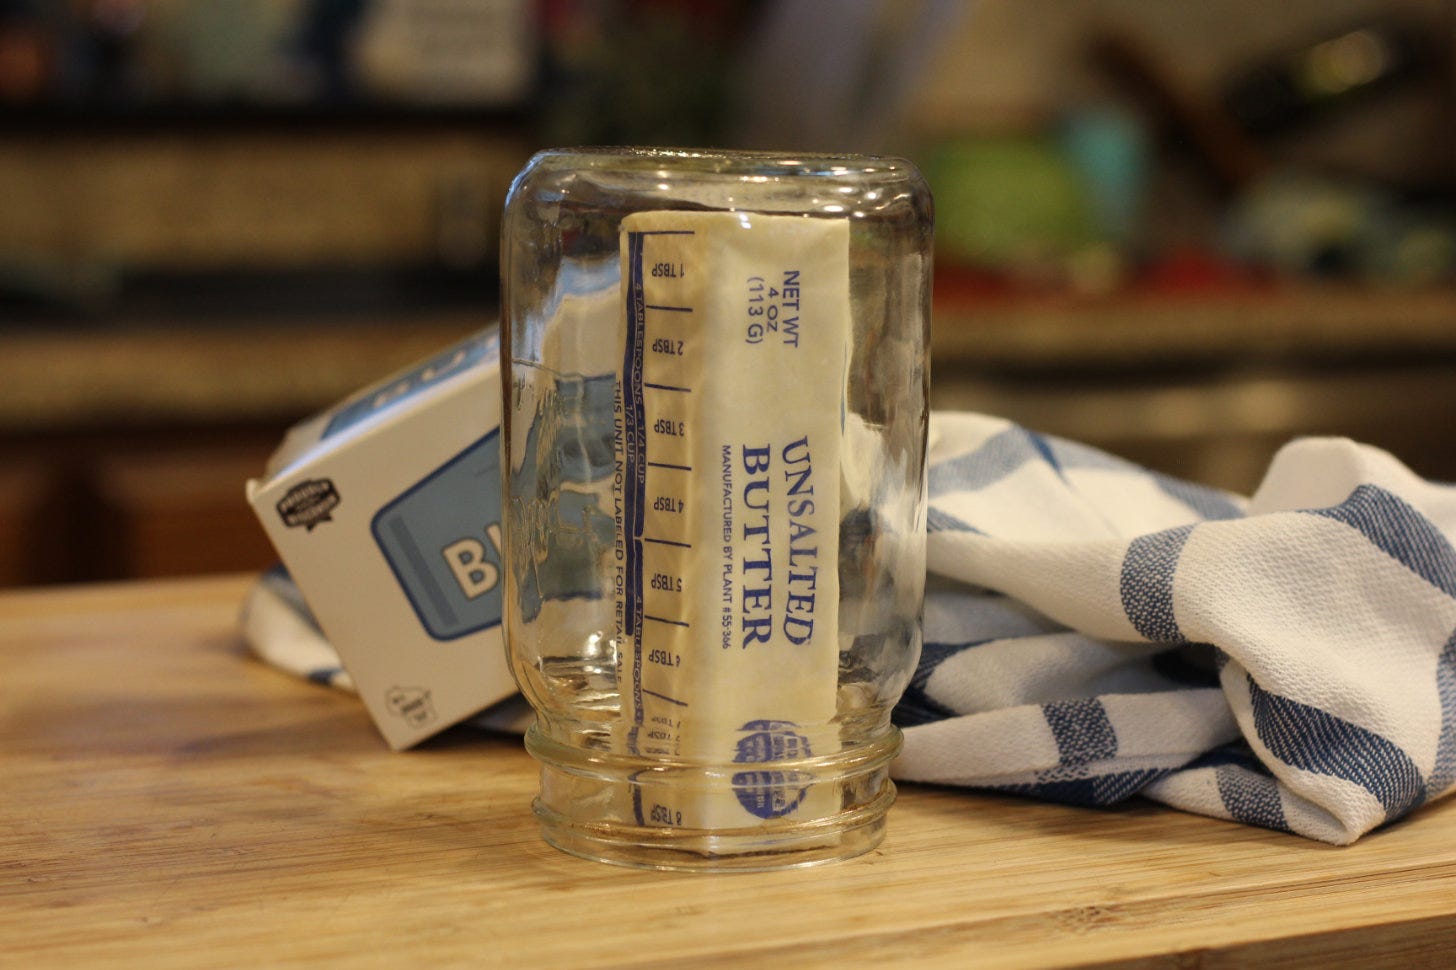
#1 – Use a jar:
Heat a large mason jar (or drinking glass) of water in the microwave for 2 minutes until it gets hot. Alternatively, you can heat water on the stovetop by pouring boiling water into the jar and allowing it to sit for 30 seconds.
After warming, empty the water into the sink, then cover the stick of butter with the jar placed upside down. The heat from the glass will soften the butter in less than 10 minutes.
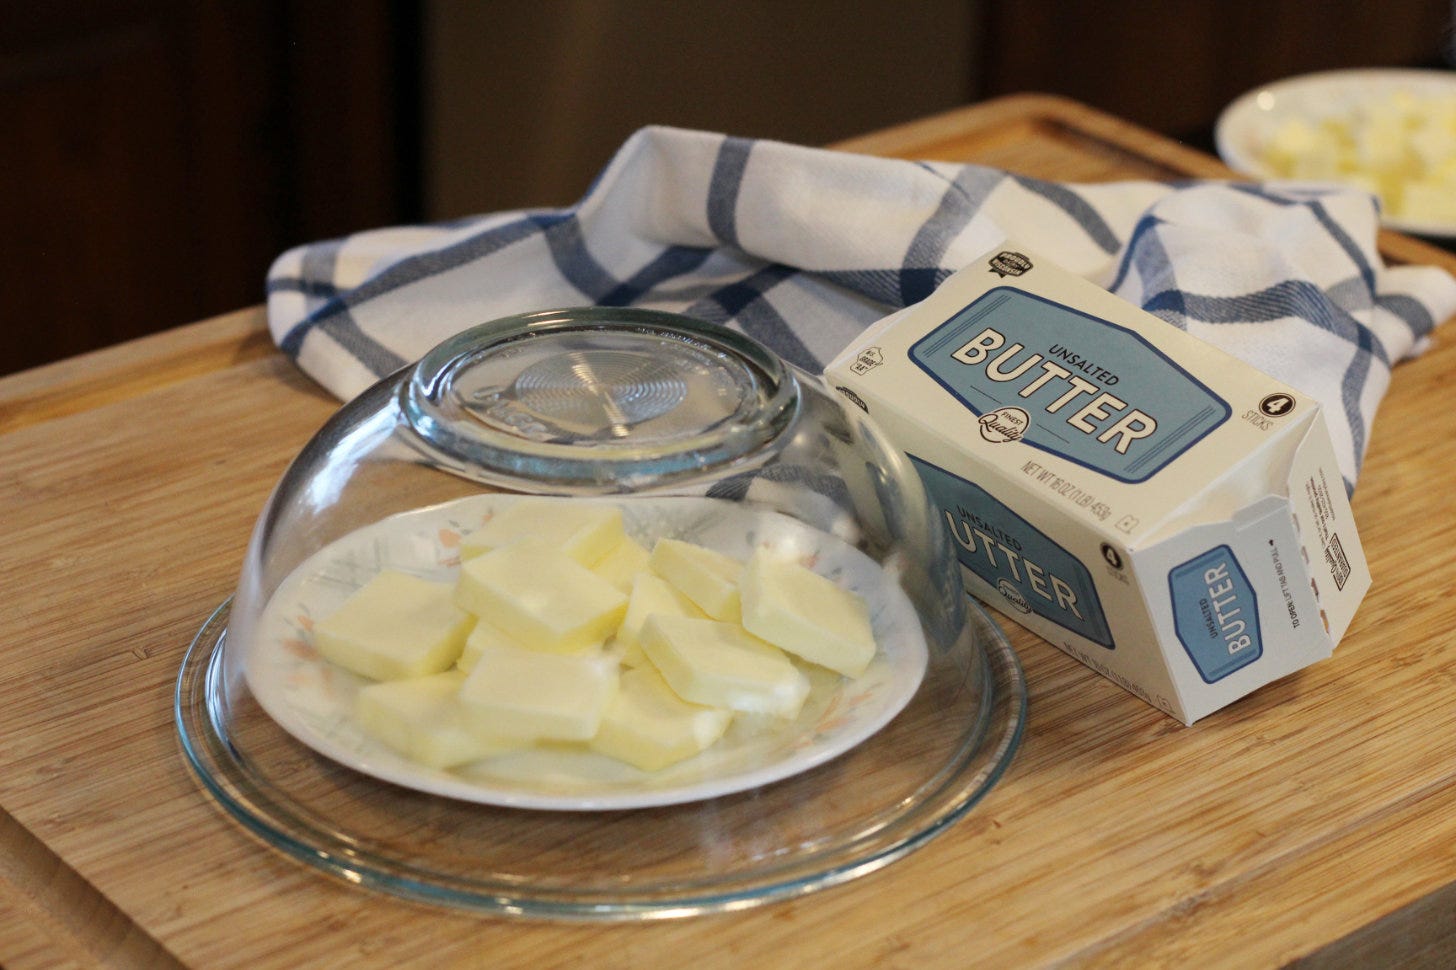
#2 – Use a bowl:
To warm the bowl, you have two options: Heat it in the microwave by adding 1 cup of water (in the bowl) and nuking it for 2 minutes, or heat the water on the stovetop using a teakettle or pan. Once the water comes to a boil, pour it into the bowl and allow it to stand for roughly a minute.
Meanwhile, as the water heats in the bowl, slice the butter and arrange the slices in a single layer on a plate small enough to fit under the inverted bowl.
Discard the water down the drain. Flip the bowl over the top of the plate and let the butter rest. The warmth of the bowl will melt the butter, so it’s ready to use in about 10 minutes!
How to Quickly Bring Eggs to Room Temperature
The temperature of your butter is not the only important consideration. You have likely noticed many recipes call for room-temperature eggs in the ingredient list. For instance, when using the creaming method to make a cake, cold eggs can cause the batter to curdle. Adding cold eggs (or milk, for that matter) to the butter can lead to an inconsistent, lumpy texture.
Curdled cake batters with a lumpy texture may interfere with the cake’s rise, resulting in a denser final product. Cold, solidified batters tend to form a domed shape rather than baking flat and can often contain tunnels and holes.
Using eggs at room temperature and room-temperature butter are frequent suggestions in baking recipes. However, this is also often overlooked in many kitchens. Let’s face it: If a step adds time and effort to a task and we don’t understand its significance, many cooks will ignore it and move on as if it doesn’t matter.
What is the purpose of this instruction?
Without sounding naggy, if you come across a temperature note in a recipe’s ingredient list, it signals that the temperature plays a crucial role in the outcome of the baked good you’re making. Just like adhering to precise measurements, ensuring the correct temperature is vital to the recipe’s success.
Once you grasp the importance of having butter at room temperature when creaming it with sugar, note that instructions often mention phrases like “beat until fluffy” in conjunction with this crucial ingredient. This emphasis signifies the significance of having the butter at the right temperature- making it much simpler to mix with sugar and other ingredients, such as eggs.
When eggs are at room temperature, they can be dispersed and blended more easily and quickly with the other ingredients, resulting in a smooth and cohesive batter known as a stable emulsion.
Sometimes, using cold eggs can make forming a smooth batter very difficult. When too-cold eggs are mixed directly from the refrigerator with room-temperature butter, that temperature difference can cause the fat to seize and curdle, negatively impacting the cake’s texture.
One often overlooked yet crucial factor to consider with these ingredients is the impact of temperature on the formation of air pockets. When you whisk an egg, the proteins within it can effectively trap pockets of air when the egg is at room temperature. These air pockets expand during baking, creating a light, tender, and fluffy texture in the final product. It’s similar to why you vigorously whisk eggs before cooking them—to achieve that desired fluffiness!
Instances where room-temperature eggs matter:
Room-temperature eggs are not exclusive to cream-method cakes; they are also are essential for optimal results in various other recipes. Take note of these situations where using room-temperature eggs is crucial for the best outcome.
Cheesecake: When blending cream cheese and sugar, be gentle to avoid trapping air bubbles. The cheese will gradually soften and become smoother. However, adding cold eggs to the mixture can cause the cheese to stiffen and form lumps, which may prolong the blending process. While specific cheesecake recipes using a food processor can handle cold ingredients, starting with room-temperature ingredients usually yields superior results.
Muffins: Some muffins and cookies use a creaming method similar to cakes. If cream-type muffins are not made with ingredients at the right temperature, they may bake with a lower rise and a coarse texture, similar to cake. Cookies may also end up hard and flat instead of light or crispy. Following recipe instructions for room-temperature eggs is essential to prevent these issues.
Yeast Bread: When making yeast bread with more than one large egg per cup of flour, you must also be mindful of the egg temperature. Excessive use of cold eggs can impede yeast activity, leading to longer rising times. However, cold eggs play a unique role in the case of brioche. Due to its high butter content, brioche dough becomes very soft, and the cold eggs aid in maintaining its structure.
Egg Whites for Buttercream or Meringue: To prepare egg whites for buttercream or meringue, first separate the eggs while still cold to reduce the risk of yolk breakage. Then, allow the whites to come to room temperature before beating. You’ll do this because warmer whites are more malleable and can incorporate air more efficiently.
Do Eggs Always Need to Be at Room Temperature for Baking?
The short answer is no. Eggs do not need to be at room temperature for all baking recipes. However, it is generally advisable for cakes and other baked items that require a fluffy texture. Still, it is best to follow your recipe’s instructions on whether room-temperature eggs are necessary.
For instance, when baking most drop cookies, I typically don’t stress about using room-temperature eggs. Achieving fluffiness is not my primary goal; I prioritize making sure my chocolate chip cookies are chewy rather than light and airy.
Where cold eggs work fine:
At times, the temperature of your eggs holds little significance, whether they are cold, cool, or at room temperature. Here are a few instances to consider:
Baked Goods: Think about baked goods that don’t require traditional instructions for creaming butter and sugar or eggs and butter. These include paste-type cakes, where butter and flour are mixed before adding eggs and sugar, and one-bowl recipes like cakes, bars, muffins, and cookies that only require stirring or beating all the ingredients together.
Combine all ingredients simultaneously. In this instance, the eggs are used for their fat content and the protein’s capacity to establish a solid framework without trapping air.
Baked Goods with Eggs as A Topping: Recipes like breakfast pizzas featuring whole eggs cracked onto a partially baked crust or when a fresh egg is cracked into a partially baked bread “boat” and baked until the egg sets. For these recipes, chefs recommend using eggs straight from the refrigerator because chilled eggs have a higher chance of maintaining their shape while baking.
Can eggs be safely stored at room temperature?
The FDA recommends not leaving eggs at room temperature (68°F to 70°F) for longer than two hours or at higher temperatures for more than one hour.
Kitchen Hack #2 - The Quickest Way to Bring Eggs to Room Temperature
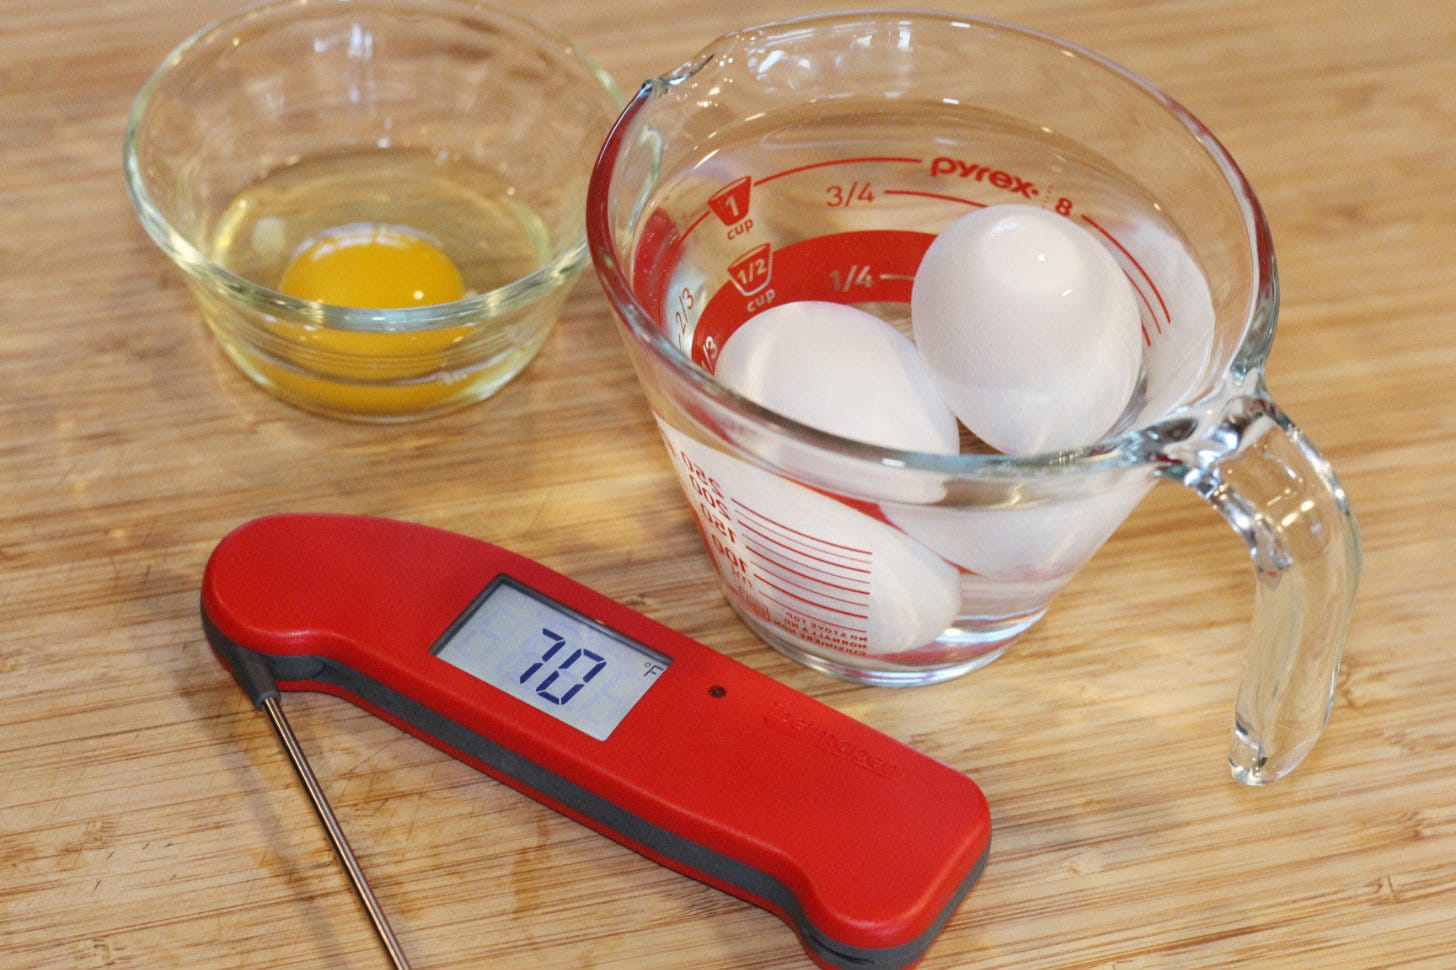
So, if you forget to take your eggs out of the fridge before baking, and your recipe requires room-temperature eggs, but all you have is cold eggs from the refrigerator, don’t worry. Here’s a quick way to warm them up:
Fill a bowl (or cup) with warm water (warm to the touch, like a soothing bath - around 110°F) rather than a scorching shower. Place the cold eggs in the water and allow them to warm to around 70°F within approximately 10 minutes.
💭Before we go
Coveted recipes just for subscribers
I’ve been working on a small but mighty feature on the website for quite some time: adding a quick-link starred (⭐) protected category to highlight recipes designated just for site-pass members. I am excited to share that everything is finally ready for you!
The “coveted recipe” category is important because I always want to make it as easy as pie for free and paid subscribers who wish to become site-pass members to find the protected posts made explicitly for them.
So, look for the star (⭐) next to recipes over on GfreeDeliciously.com. You’ll know the recipe is specifically made just for you. Then, log in or create your pass account to access these posts.
Additionally, as more pass-member recipes are published, you can easily access them and view them in an archive with all the featured posts on one convenient page.
A special thanks 💖 to the subscriber mentioned at the beginning of this LFN installment for highlighting the “details” that so many of us can easily overlook when making recipes. Her email exchange and the resulting idea for this post got me thinking much more about saving time in the kitchen while ensuring everyone’s success in making the recipes I share.
So, thanks again from my heart of hearts 💞.
Sending warm wishes!
🧈🥚Feel free to reply to this email with any additional questions! Or you can always comment below. 🌡️🫗🍳😁
Have a wonderful weekend ahead. ‘Till next time…
XOXO,
Kymberley - the coach, cook, creator, and publisher of GfreeDeliciously.com.
Like what you’re reading? Get your paid subscription with my introductory offer. Time is running out!
Free and Paid Subscribers and Founding Members of this eNewsletter receive an invitation to create a Site Pass Account at GfreeDeliciously.com, with membership plan benefits above and beyond our Tasty, Tried-and-Tested Recipes, Healthy Eating Advice, and inspiration. Pass members get invites to private online events, groups, workshops, downloads, freebies, select eBooks, meal plans, exclusive discounts, occasional giveaways, etc.
Your subscriptions support this small business and are much appreciated.