Strawberry Rhubarb Pie
Indulge in the ultimate old-fashioned strawberry rhubarb pie with a buttery, flaky, gluten-free homemade pie crust. Perfect for springtime!
The Best Gluten-Free from Scratch Strawberry Rhubarb Pie
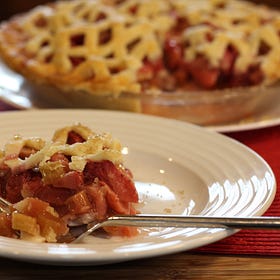
This classic ruby-hued Old-Fashioned Strawberry Rhubarb Pie is the perfect taste combination of equal parts tart and sweet. The mouthwatering filling is made without tapioca and packed with juicy strawberries and tart rhubarb, all baked in a buttery, flaky, gluten-free homemade pie crust. Easy to make, it’s a super tasty springtime or early summer dessert indulgence and so good with a scoop of vanilla ice cream!
Make this Ultimate Old-fashioned Indulgence in A Buttery, Flakey, (Gluten-Free) Homemade Pie Crust
There’s just something about Springtime and fresh strawberries and rhubarb that inspires the pie baker in me. This recipe for Old-Fashioned Strawberry Rhubarb Pie is a classic. Its perfect tart and sweet taste reels me back to flavorful springtime and summer good times, porch swings, and sharing with family and friends. I guess I'm forever the romantic. I do love this pie!
👩🍳 Make this pie with our Best Buttery, Flaky, Gluten-Free Pie Crust recipe using one of our favorite all-purpose gluten-free flour blends. 👩🍳
How to get this recipe:
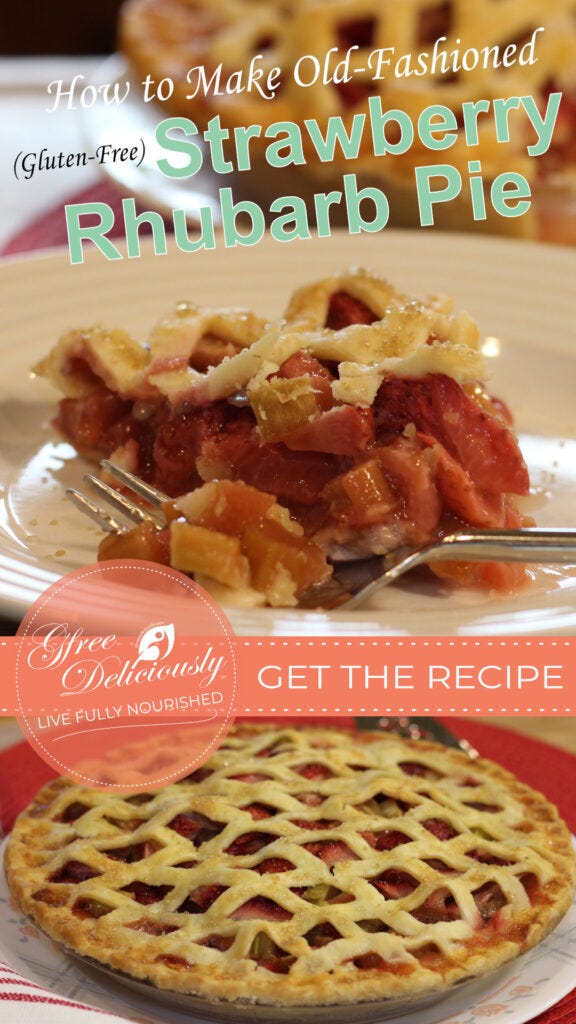
You can access the How to Make Old-Fashioned Strawberry Rhubarb Pie digital recipe card on GfreeDeliciously.com. Once there, you can easily pin, favorite, print, or save it and find the equipment, ingredients, and other resources used in making this recipe.
Keep scrolling 👇 for a quick look at my kitchen notes and everything else needed to ensure your best success!
Of course, if you’re a paid pass subscriber, you can also download the PDF-formatted, 3-ring binder-ready recipe sheet to save or print, which is ready for you at the end of this post.
To get even more juicy details, read LFN #35, which has bonus information about this recipe…
Old-Fashioned Strawberry Rhubarb Pie - LFN#035
Welcome to this week’s installment of Living Fully Nourished, where I’m sharing what Dear Hubby and I think is the best strawberry rhubarb pie recipe! It’s an old-fashioned recipe inherited a few years back. In this article, you’ll read more about my challenges with it. So, let’s get to it!
A fruit and vegetable match made in heaven ...
If you love strawberries and rhubarb, this seasonal fruit and vegetable combination is terrific in this old-fashioned pie worth resurrecting. By making it gluten-free, it also updates the classic springtime and early summer pie to meet gluten-free dietary requirements so everyone can enjoy a slice of the pie (so to speak).
So, whether you’re new to gluten-free pie baking or a seasoned pro, I think you’ll find that this old-fashioned strawberry rhubarb pie classic—now made gluten-free—is guaranteed (if you’re anything like me) to infatuate the pie baker in you, too, with fresh strawberries and rhubarb straight from the garden or market stand.
Indeed, it’s become one of my favorite pies and ways to use fresh strawberries, and when rhubarb season is finally here, the combination begs for pulling out all the stops to find excuses to serve it.
Sign Up & Register
💭 Before you get started...
You need to know this recipe is so much easier than it looks!
From start to finish, this yummy, classic, Old-Fashioned Strawberry Rhubarb Pie will attract you with the first hint of its sweet aroma as it bakes. It will lure you (and anyone lucky to be within smelling distance) with drool-worthy fruity-fragranced caramelized sugary smells. The strawberry and rhubarb intermingle, making the filling deliciously luscious as it bubbles and peeks up through the buttery crust, baking to a beautiful golden-brown top with rosy-hued eye appeal.
Equal parts tart and sweet, it’s the perfect tasty pie dessert to share. I encourage you to enjoy this indulgence while sitting among family and friends on the porch in the cool breezes of early summer.
And, like strawberries and rhubarb (as if they were made for each other), I recommend serving a generous pie slice with a dollop of ice cream or real whipped cream topping.
Serving it this way – it’s sweet, tart, juicy, cool, creamy, and well … perfect in every way!
Thanks for stopping by. Have a happy time baking!
Old-Fashioned (Gluten-Free) Strawberry Rhubarb Pie
Gluten-Free + Nut-Free, Vegetarian, Soy-Free, Pescetarian
This classic ruby-hued Old-Fashioned Strawberry Rhubarb Pie is the perfect taste combination of equal parts tart and sweet. The mouthwatering filling is made without tapioca and packed with juicy strawberries and tart rhubarb, all baked in a buttery, flakey, gluten-free homemade pie crust. Easy to make, it’s a super tasty springtime or early summer dessert indulgence and so good with a scoop of vanilla ice cream!
EQUIPMENT
Rolling Pin
9-inch Glass Pie Plate
Pastry Lattice Roller Cutter
Baking sheet
Pie Crust Shield
Large mixing bowl
Cutting Board
Utensils
INGREDIENTS
1 Homemade Pie Crust (my recipe makes two crusts: one for the bottom and one for the top)
3 cups sliced Rhubarb (1/2 inch pieces)
2 - 1/2 cups chopped Strawberries
1/3 cup packed Light Brown Sugar
1/3 cup Granulated Sugar
1/4 cup Instant Modified Food Starch (may substitute gluten-free cornstarch)
1/4 teaspoon Salt
1 tablespoon Orange Juice
1/2 teaspoon pure Vanilla Extract
2 tablespoons unsalted Butter (cut into small pieces)
1 tablespoon Milk
coarse Sugar for garnish (optional)
INSTRUCTIONS
For the crust
Lightly grease a 9” glass pie plate with butter, shortening, or homemade pan release. Prepare my pie crust recipe in steps 2 through 5.
Preheat oven to 400°F (204°C).
Make the filling
Stir the rhubarb, strawberries, brown sugar, granulated sugar, cornstarch, salt, orange juice, and vanilla extract in a large bowl. Set filling aside as the oven preheats.
To assemble the pie
Allow the chilled pie dough to rest at room temperature for 10 to 15 minutes. Divide the dough in half and shape each half into a disc. Place one of the discs onto a sheet of plastic wrap (cover the other one with plastic wrap so it doesn’t dry out and keep it in the refrigerator until needed). Put another sheet of plastic wrap over the top of the first disc (step 8 in the crust instructions) and begin rolling from the center into a circular shape until the dough is about 1/8-inch thick and you have a circle about 12 inches in diameter.
Remove the plastic wrap from the top and carefully invert the crust into the prepared pie plate. Then, remove the bottom plastic wrap piece. Press the pie dough lightly into the bottom and sides, then trim the extra dough hanging from the edges. Spoon the filling into the crust, leaving all the excess liquid in the bowl (you don’t want that liquid in the filling—it will make the pie too juicy, so discard it). Dot the pieces of butter on top of the filling.
The lattice top
Remove the saved disc of chilled pie dough from the refrigerator. Roll between two sheets of plastic wrap (as above) until the dough is about 1/8-inch thick and you have a circle about 12 inches in diameter. Remove the plastic wrap from the top. Use a lattice roller cutter, running it over the pie dough to cuts slits in the dough. Carefully invert and center the top crust over the prepared pie plate, then remove the plastic wrap piece, enabling you to pull slightly on the dough as you arrange it over the pie to make an easy lattice pie crust. [1]
Once the lattice is on top, press the outer edges of the top into the bottom pie crust to seal the two together. Use a small knife to trim off excess dough. Crimp the crust edges with a fork if desired. [2]
Lightly brush the top of the pie crust with the milk to help it brown. Sprinkle the top with a bit of coarse sugar for a professional finish.
Bake
Place the unbaked pie onto a large pizza pan or baking sheet (to catch any messy, juicy boilovers) and bake for 20 minutes at 400°F (204°C). With the pie still in the oven, reduce the temperature to 350°F (177°C) and continue baking for 30-35 minutes until the color of the crust is nicely golden-brown. You will also notice that the filling will bubble up slightly through the lattice or slits in the crust for venting the pie. [3]
Serving and storage
Allow the pie to cool at room temperature for three hours before serving. Cooling allows the filling to thicken. Cover leftovers tightly and store in the refrigerator for up to five days.
Kitchen Notes:
[1] Alternatively, use a pastry wheel, sharp knife, or pizza cutter to cut strips 1/2 – 1 inch wide. Carefully thread the strips over and under one another, pulling back strips as necessary to weave the top.
[2] If making a lattice top seems too fussy, cover the filling with the 12-inch pie dough circle after it’s rolled out. Cut slits in the top to form steam vents. Trim and crimp the edges. Alternatively, adding a crumble or streusel topping would also be great.
[3] After the first 20 minutes of baking time, if the top crust looks like it’s becoming too browned, place a pie crust shield (or aluminum foil) over the top or around the pie edges to prevent them from browning too quickly.
Easy crumble topping:
Combine 1/2 cup brown sugar and 1/2 cup gluten-free all-purpose flour in a small bowl. Using a fork, cut 2-3 tablespoons of cold diced butter into the flour mixture until crumbly. Sprinkle evenly across the top of your pie before baking.
Make Ahead & Freezing Instructions:
This a great pie to make one day in advance since it is so juicy – the filling will have time to set overnight. The pie crust dough can also be prepared beforehand and stored in the refrigerator for up to 5 days or in the freezer for up to 3 months. Baked pie freezes well for up to 3 months. Thaw overnight in the refrigerator and allow to come to room temperature before serving. The prepared filling can also be frozen for up to 3 months and thawed overnight in the fridge before use.
Enjoy the Recipe! Scroll to the end for the downloadable PDF, which you can print and save to your recipe binder.
Please let me know in the comments below if you have questions or if you tweak the recipe. I'd love to hear from you!
Are you looking for more recipes?
Find similar recipes to this one in…
Want to read more about this recipe? Upgrade to paid to always get more!
As a paid pass member, you get more stories, food history, and everything GfreeDeliciously.
Formatted, downloadable recipe PDFs to print and save in a 3-ring binder
Family-friendly meal ideas
Gluten-free cooking, healthy eating ideas, nutrition, encouragement, and easy-to-implement lifestyle strategies...
Check out more about this recipe HERE.
Download the PDF printable 3-ring binder formatted page below.
Print, then punch to fit in your 3-ring binder, and file the recipe by name, alphabetically in the tabbed section:
Keep reading with a 7-day free trial
Subscribe to Live Fully Nourished @GfreeDeliciously to keep reading this post and get 7 days of free access to the full post archives.


