


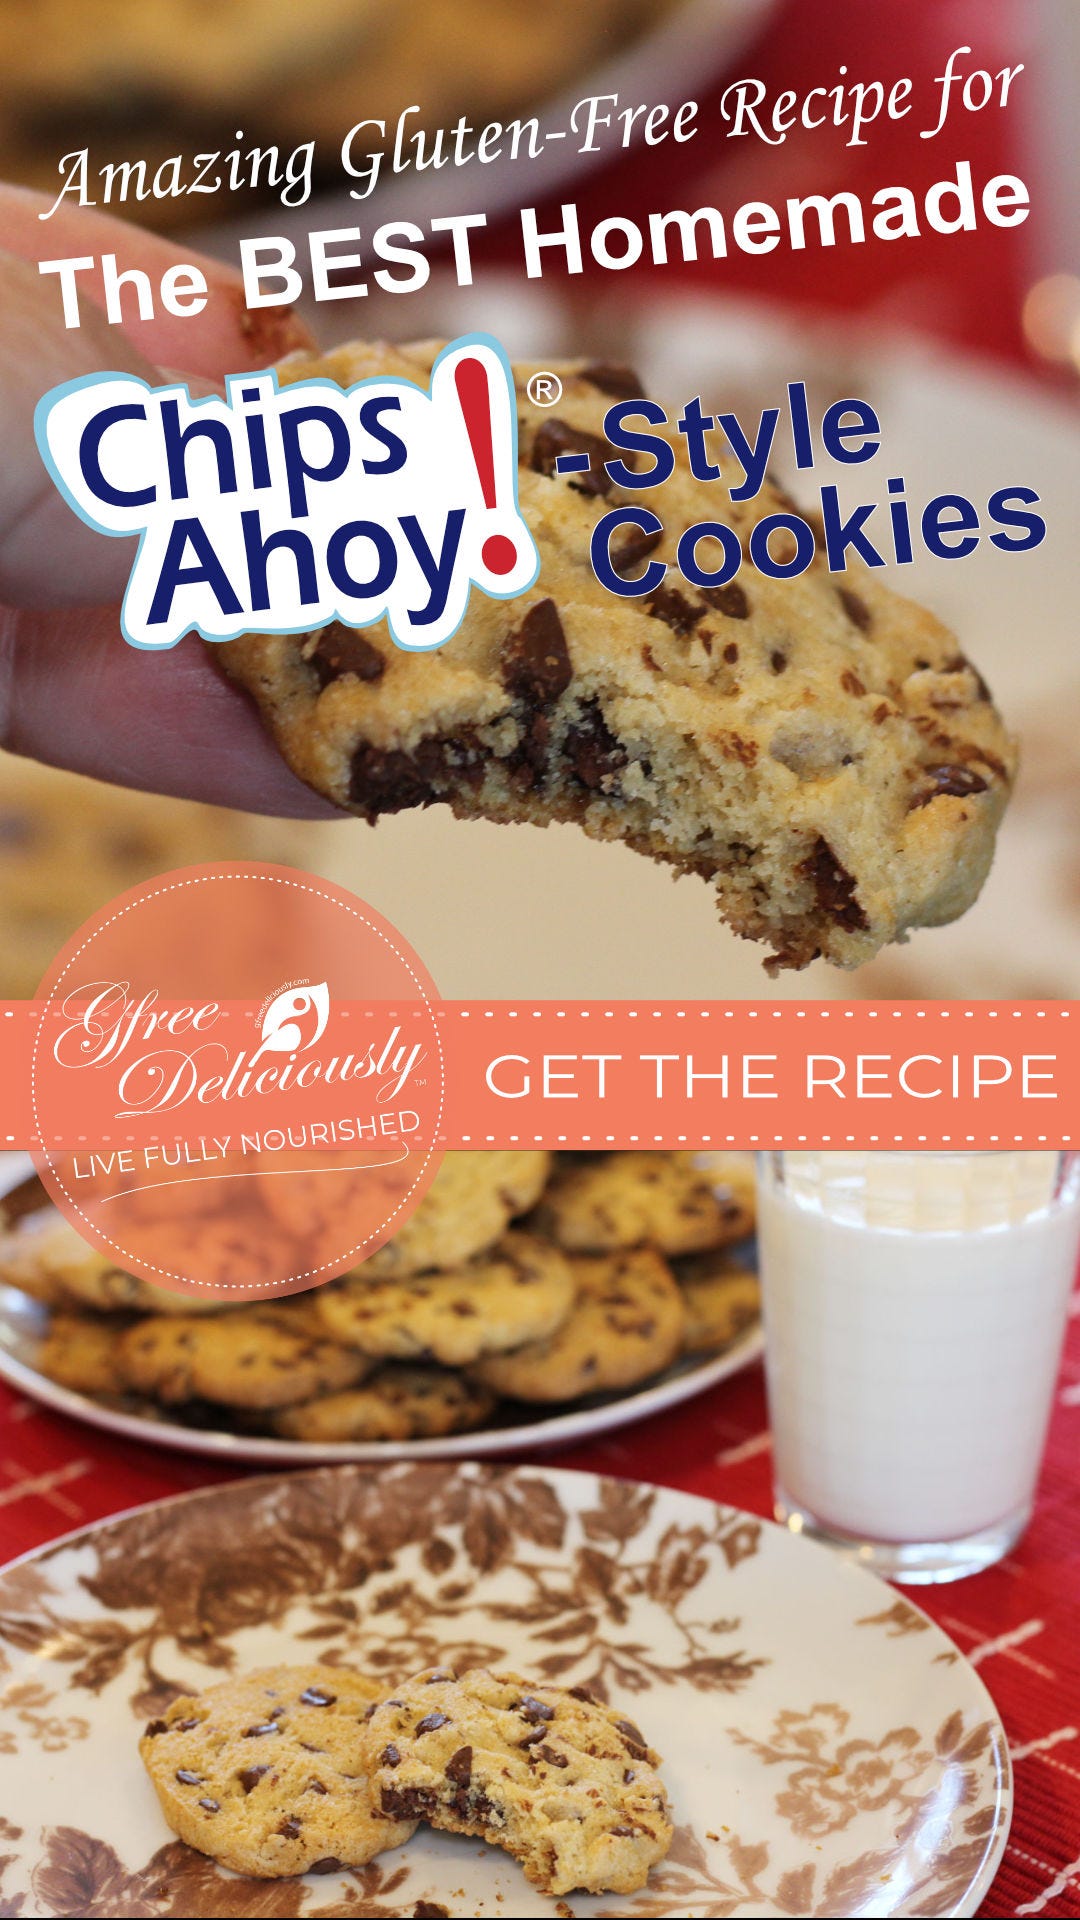
Homemade Gluten-Free Chips Ahoy!-Style Cookies
LFN#243: A Shoutout to GFOS for inspiring this recipe behind my lazy baker's slice-and-bake cookies + Some cookie history 🍪

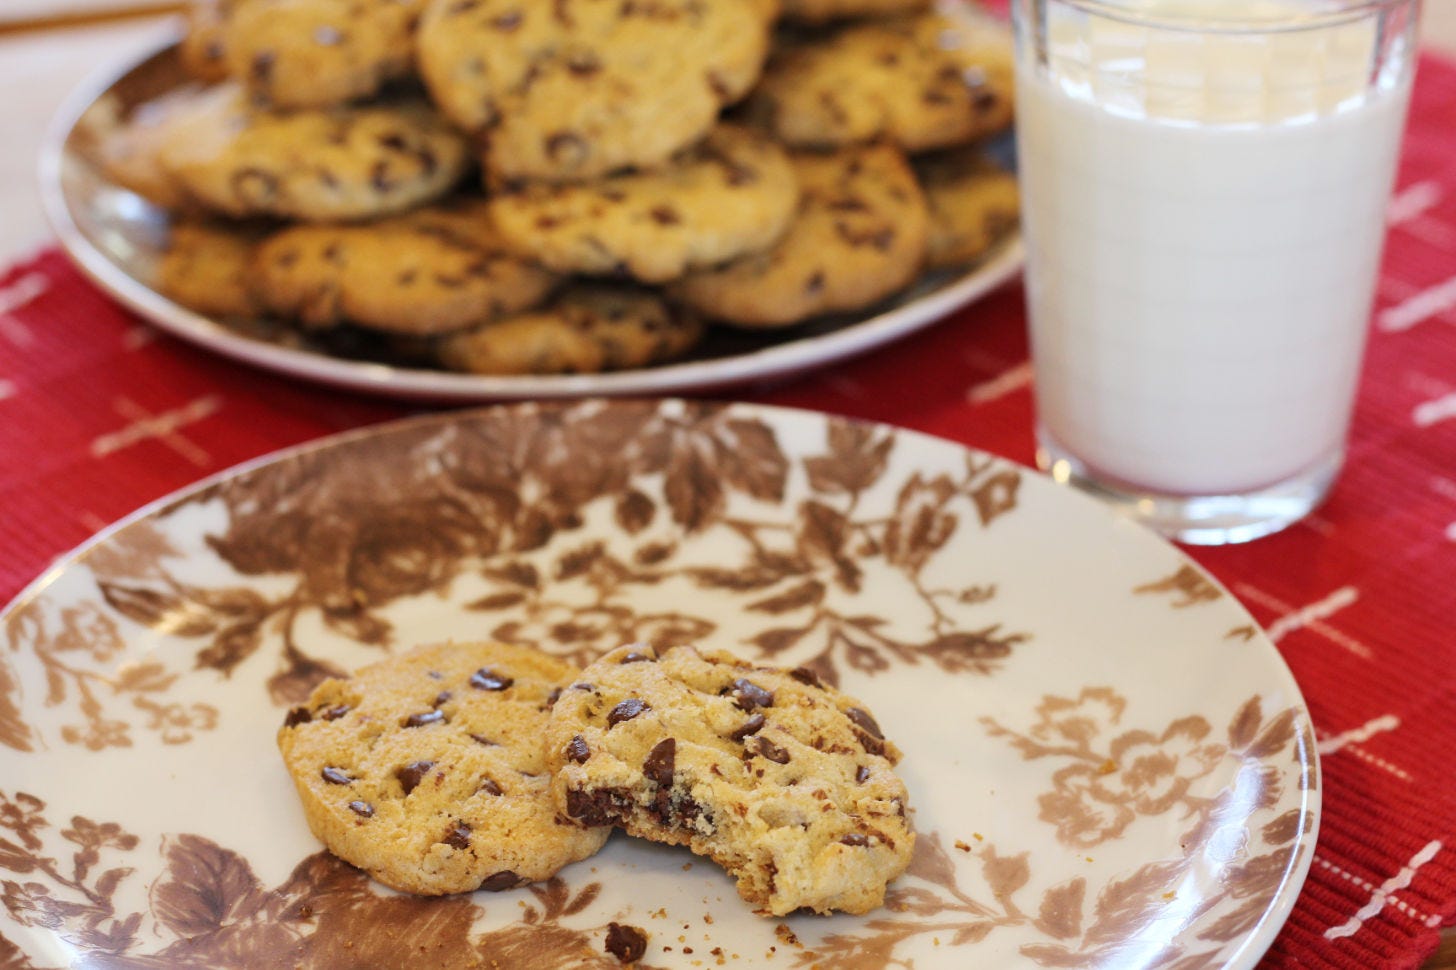
Possibly the Best Homemade Chips Ahoy-Style Cookies You’ll Ever Eat!
Many will think that the addictive nature of these Chips Ahoy-style cookies is due to their unique texture and flavor combination. But while it's a carefully crafted blend of ingredients that begs you to indulge, gluten-free or not, I think the secret to these delicious cookies lies more in the science behind the perfect gluten-free variation of the original cookies. It makes them possibly the best homemade Chips Ahoy-style cookies you'll ever eat!
How to Make the BEST Gluten-Free Chocolate Chip Cookies
So many amazing gluten-free chocolate chip cookie recipes appear with a simple web search across the internet. A recipe for the BEST Gluten-Free Chocolate Chip Cookies by Nicole Hunn of the popular blog Gluten-Free on a Shoestring resides towards the top of that list.
As someone who must eat gluten-free and a fellow gluten-free blogger, I’ve followed the GFOS blog for numerous years, enjoying lots of Nicole’s recipes and great tips for baking gluten-free. So, after skimming 50 or more of nearly 400 5-star reviews for her recipe for the best GF chocolate chip cookies, I had to try her recipe myself.
Then, I tweaked it slightly.
My adaptation of Nichole's gluten-free chocolate chip cookie recipe introduces an easy slice-and-bake option, eliminating the need to scoop and shape individual cookies before refrigerating and then baking them.
My Lazy Baker's Shortcut, Plus a Slight Variation in Chips
So, while scooping and shaping individual cookies before refrigerating them works well, the recipe below slightly differs from the original. I've shortcut the process of forming individual cookies by rolling the dough into a log, then cutting and baking it.
Forming it into a log, then wrapping the dough log in plastic wrap or storing it in silicone slice-and-bake cookie dough keepers, takes up much less space in the fridge. Using cookie dough keepers also allows for easy freezing of the dough, preventing freezer burn and keeping the cookie logs fresher for longer, which can be a future time-saver.
Additionally, instead of using regular-size semisweet chocolate chips, I switched these up by substituting mini semisweet chocolate chips to increase the chocolate chip goodness in every bite. The result is a recipe that, at least in my mind, perfectly mimics what I remember as a Chips Ahoy! Cookie!
The GFOS blog also has a somewhat comparable recipe for Gluten-Free Chips-Ahoy-Style Cookies. However, it includes vegetable shortening, uses only one egg, and uses regular-size semisweet chocolate chips. After making and comparing both recipes, I prefer the "best gluten-free chocolate chip cookies" version with slight modifications.
How to get my recipe variation:
You can access my version of the Best Homemade Chips-Ahoy!®-Style Cookies digital recipe card on GfreeDeliciously.com. Once there, you can easily adjust the servings, add ingredients to your grocery list, read about the equipment and resource recommendations we’ve used to make it, and quickly print, pin, or favorite it!
Keep scrolling 👇 for a quick summary of the recipe below. 👩🍳
As an added benefit to paid subscribers, you can download a 3-ring-binder-ready printable recipe PDF. Find it at the end of this post to print or save for building a cookbook of all your favorites!
Sign Up & Register
The Cookies You Know and Love
If you're like me, Chips Ahoy! Cookies evoke many memories from growing up, snacking on the cookie treat famous for its crunchy outside and soft, chewy inside, while watching early morning Saturday cartoons, or enjoying an after-school treat before heading outdoors to play.
I’ve had a genuine liking for the packaged cookies from way back when. But since my celiac disease diagnosis, being 100 percent gluten-free has changed everything, so those hankerings for many brand-name treats can be satisfied only in my very own kitchen.
Still, you can buy them…
Nabisco introduced gluten-free Chips Ahoy in 2024 on a mission to ensure everyone could enjoy its tasty cookies. According to a spokesperson for the company, it took them more than 40 recipes and over 30,000 hours to develop the perfect gluten-free Chips Ahoy cookie. But at 51 cents a cookie (or more, depending on where you buy them), they're way more expensive than I care to spend on the most addictive indulgences that one may be prone to.
Not that I would ever endorse such indulgent acts. But some of us occasionally want to throw some caution to the wind. 😉Just saying…
A Brief History of Chips Ahoy Cookies
Suppose we peek behind the brand curtains and explore the fascinating history and process of creating Chips Ahoy! Chocolate chip cookies.

A Sweet Inception
We find that Chip Ahoy! made its debut in 1964, brought to life by Nabisco, a well-known brand of snack foods. The original concept aimed to design a soft and chewy cookie on the inside, complemented by a crispy outer layer and packed with chocolate chips baked into every bite. The breakthrough packaging design featured a clear plastic wrapper, allowing consumers to view the cookies before opening the package, which contributed to its immediate success. Throughout the years, the brand and packaging) has experienced several transformations, the most notable being its acquisition by Mondelēz International in 2012.
So what's with the Name Chips Ahoy!?
The name "Chips Ahoy!" is said to be derived from the nautical exclamation "Ships Ahoy!," a commonly used term to announce the arrival of vessels.
Interestingly, the pun originates in chapter 15 of Charles Dickens' novel, The Uncommercial Traveller, featuring a character named Chips, who was teased using the expression "Chips ahoy!" While this may not be the most logical reason for naming a cookie, numerous other explanations exist.
A somewhat related explanation is that the name was intentionally infused with a sense of fun and playfulness. No matter what inspired it, over time, the name has become synonymous with the brand, making Chips Ahoy! one of the most cherished cookie brands.
The Store-Bought Package Ingredients
So, what makes gluten-free Chips Ahoy cookies so appealing? The package reveals its carefully crafted blend of ingredients. Here's a breakdown of the package ingredients listed:
Semisweet Chocolate Chips: The abundant star of the show, these chocolate chips are responsible for the iconic taste, adding to Chips Ahoy's overall chocolate-filled goodness!
Tapioca Starch, Oat Flour, Rice Flour, and Cornstarch: provide the foundation for the cookies, giving them structure and texture.
Soy Lecithin: a natural fatty compound extracted from soybeans and used as an emulsifier to stabilize the mixture and improve the texture and shelf life.
Sugar, (Corn) Dextrose, Invert Sugar: add sweetness and tenderness to the cookies. Invert sugar is a sweetener made from breaking down table sugar (sucrose) into its simpler components, glucose and fructose. It is sweeter than regular sugar, retains moisture better, and is commonly used in manufactured baked goods.
Palm Oil contributes to the cookies' softness and moisture content.
Whey: an alternative to eggs with a similar makeup, whey is high in protein and supplies structure to baked goods.
Leavening: (Baking soda and ammonium phosphate) helps the cookies rise.
Salt, Xanthan Gum, Datem, Caramel Color (Natural and Artificial), and Flavor: Salt enhances the flavor, balances sweetness, and can help strengthen the dough. Xanthan Gum is a thickening and binding agent, especially in gluten-free baking. Datem helps create the texture and shape. Caramel Color imparts a brown color. Natural and Artificial flavors enhance the cookies' flavor.
Moreover, the ingredients of Chips Ahoy cookies feature a mix of elements that stimulate the release of dopamine, a neurotransmitter associated with feelings of pleasure and reward. The combination of sugar, fat, and salt activates the brain's reward pathways, making it challenging for consumers to limit themselves to just one.
All this results in an irresistible blend that has made Chips Ahoy! a favorite for countless fans.
The Manufacturing Process
Then there's the whole fascinating manufacturing process of making Chips Ahoy cookies, with the simplified step-by-step procedure looking something like this:
Mix the dough
Add the chocolate chips
Chill the dough
Cut and form the cookies
Bake the cookies
Package the cookies
Quality control
💭 Before you get started...
The "Cookie Magic and Science" behind possibly the best homemade Chips Ahoy-style cookies you’ll ever eat!
So what makes these homemade Chips-Ahoy-style cookies so good? It's all about the perfect combination of texture, flavor, and cookie appearance, especially when fresh-baked. Here's my short list of what I think contributes to the cookie magic:
The Maillard Reaction: When baking, the interaction between amino acids and reducing sugars triggers a chemical process that produces the cookies' golden-brown color and rich, yet not-too-sweet and savory, taste.
Moisture Management: Carefully regulating moisture levels in the dough and baking to the precise doneness ensures that the cookies stay soft and chewy inside, preventing them from becoming overly crispy or dry.
Chocolate Chip Distribution: Selecting mini chocolate chips creates an unpredictable arrangement of chips throughout, adding an element of thrill and surprise. Abundant chips ensure that every bite is full of chocolatey flavor and deliciously delightful.
In the end, it's worth noting that replicating the exact texture and flavor of Chips Ahoy Cookies might be challenging without access to Nabisco's proprietary recipe and manufacturing technology, but making them at home can still be fun and delicious, minus the more funky packaged ingredients, especially with this Homemade Chips-Ahoy-Style Cookies recipe.
Fast-forward to today, and my love for the fresh-baked classic—crunchy on the outside, soft and chewy on the inside, loaded with melt-in-your-mouth chocolate chips—has only grown. But now I've swapped the package of store-bought cookies for these I can make at home, without the gluten, and still with all the nostalgia.
Of course, they're always best when eaten fresh from the oven and slightly cooled. Enjoy!
Thanks for stopping by. Have a happy time baking!


The Best Homemade Chips-Ahoy!®-Style Cookies

Gluten-Free + Nut-Free, Soy-Free
👩🍳 Adapted from The BEST Gluten-Free Chocolate Chip Cookies by Nicole Hunn of the popular blog Gluten-Free on a Shoestring. 👩🍳
Easy slice-and-bake homemade Chips-Ahoy-Style cookies loaded with so many chocolate chips, you can't bite them without missing any. Thick and perfectly round, the cookies have a crunchy exterior that gives way to a soft, chewy center packed with melt-in-your-mouth semisweet chocolate chips. Addictive? Yes! Of course, they'll leave you wanting more…
Equipment
1 Large mixing bowl
Plastic Wrap
Unbleached Parchment Paper
2 Rimmed Baking Sheets
Utensils (Whisk, Fork, Measuring Cups and Spoons, Cook's Knife)
2 silicone slice-and-bake cookie dough keepers, optional
Ingredients
▢ 2 ¼ cups Better Batter gluten-free All-Purpose Flour
▢ ¾ cup granulated Sugar
▢ 1 teaspoon baking soda
▢ ½ teaspoon heaping Xanthan Gum, omit if your flour includes it
▢ ½ teaspoon table salt
▢ ¾ cup packed light Brown Sugar
▢ ½ cup Unsalted Butter at room temperature
▢ 2 large eggs at room temperature
▢ 1 tablespoon pure Vanilla Extract
▢ 12 ounces (1 package) of semisweet Mini Chocolate Chips
Instructions
Dough
Combine the flour, xanthan gum, salt, baking soda, and granulated sugar in a large bowl, whisking until the mixture is well combined.
Add the brown sugar, using the tines of a fork to break up any lumps, and then whisk it thoroughly into the flour mixture until well combined.
Create a well in the center of the dry ingredients, then add the butter, eggs, and vanilla extract, mixing until the mixture is smooth and homogeneous. Stir the mixture into the flour and sugar a little at a time until well combined.
Mix the mini chocolate chips into the cookie dough until evenly distributed.
Place a long sheet of plastic wrap on the counter or table. Dump the cookie dough onto the plastic wrap and form it into a thick log, approximately 10-12 inches long and 1-3/4 to 2 inches in diameter from top to bottom. Press and roll the dough log tightly so the cookie dough has no air pockets. [1]
Wrap the plastic wrap tightly around the dough log and refrigerate it for at least 12 hours and up to five days.
Slice and Bake
Preheat the oven to 350°F—line rimmed baking sheets with unbleached parchment paper and set aside.
Remove the chilled cookie dough log from the refrigerator and discard the plastic wrap. Using a sharp knife, cut slices off the cookie dough log crosswise into discs about 1/4 inch thick.
Place the discs about 2 inches apart onto the prepared parchment-covered baking sheets. Place the baking sheets, one at a time, on the middle rack in the center of the preheated oven. Bake for 10-12 minutes until the cookies are golden brown around the edges, set in the center, and lightly golden brown across the top.
Remove the cookies from the oven and allow them to cool for 3-5 minutes on the baking sheets until firm. Then, transfer them to wire racks to cool completely.
Store in an airtight container.
Kitchen Notes:
When reviewing Nichole's original recipe, I encourage you to read her expert tips and ingredient substitutions, which will guide you through chilling, pressing the dough, and mixing it, as well as how to make the recipe dairy-free or egg-free if needed. Then, please scroll down for her kitchen notes about different gluten-free flour blends tested and how each relates to making the recipe.
Footnotes:
[1] As an alternative to plastic wrap, I've fallen head over heels in love with using silicone slice-and-bake cookie dough keepers instead. They come in a set of two, which is the perfect size for dividing one recipe into two slice-and-bake logs. After refrigerating, pop the cookie logs from the silicone keepers. Imprinted markings in the dough make it easy to cut into perfect thickness discs for baking.

Storage
Baked cookies will stay fresh at room temperature in an airtight glass container or tightly sealed cookie jar for up to 5 days.
If you're scooping and shaping individual cookies before freezing, you can store the shaped cookie dough in the refrigerator in a sealed zipper-top bag and bake the cookies one at a time or in small batches.
For extended storage, the cookie dough logs, shaped cookie dough, or baked and cooled cookies freeze perfectly for up to 3 months.
Before baking cookie dough from frozen logs, I recommend defrosting them in the refrigerator overnight, then cutting and baking as described.
You can bake shaped frozen cookie dough without defrosting it, but as Nichole suggests, press the shaped raw dough discs a little flatter before baking so they don't spread too much. You'll also want to add roughly 2 minutes to the baking time.
Enjoy the Recipe! Scroll to the end for the downloadable PDF, which you can print and save to your recipe binder.
L♥VE this recipe? Have you tweaked it to be over-the-top delicious? Have a question? Please let everyone know in the comments below! 😉 It’s super helpful for other readers and me.

Are you looking for more recipes?
Find similar recipes to this one in…
Download the PDF printable 3-ring binder formatted page below.
Print, then punch to fit in your 3-ring binder, and file the recipe by name, alphabetically in the tabbed section:
Keep reading with a 7-day free trial
Subscribe to Live Fully Nourished @GfreeDeliciously to keep reading this post and get 7 days of free access to the full post archives.